Templates
Download free templates
Quentn provides you with 30 templates free of charge, all of which you can edit according to your wishes. So don't choose the template according to the content, but according to the design and the composition of the text and images. Everything can be replaced and adjusted at any time.
- Click on the menu item Campaigns and Templates.
- Firstly, your saved templates will be displayed. To select ready-made templates, click on the Quentn Templates tab.
- Choose a template. You can enter search terms to get a pre-screening. For example, if you search for "Webinar", you will be shown templates for advertising a webinar.
- To use the desired template, hover the mouse over the template. A green button "Create new" will appear, which you should click on.
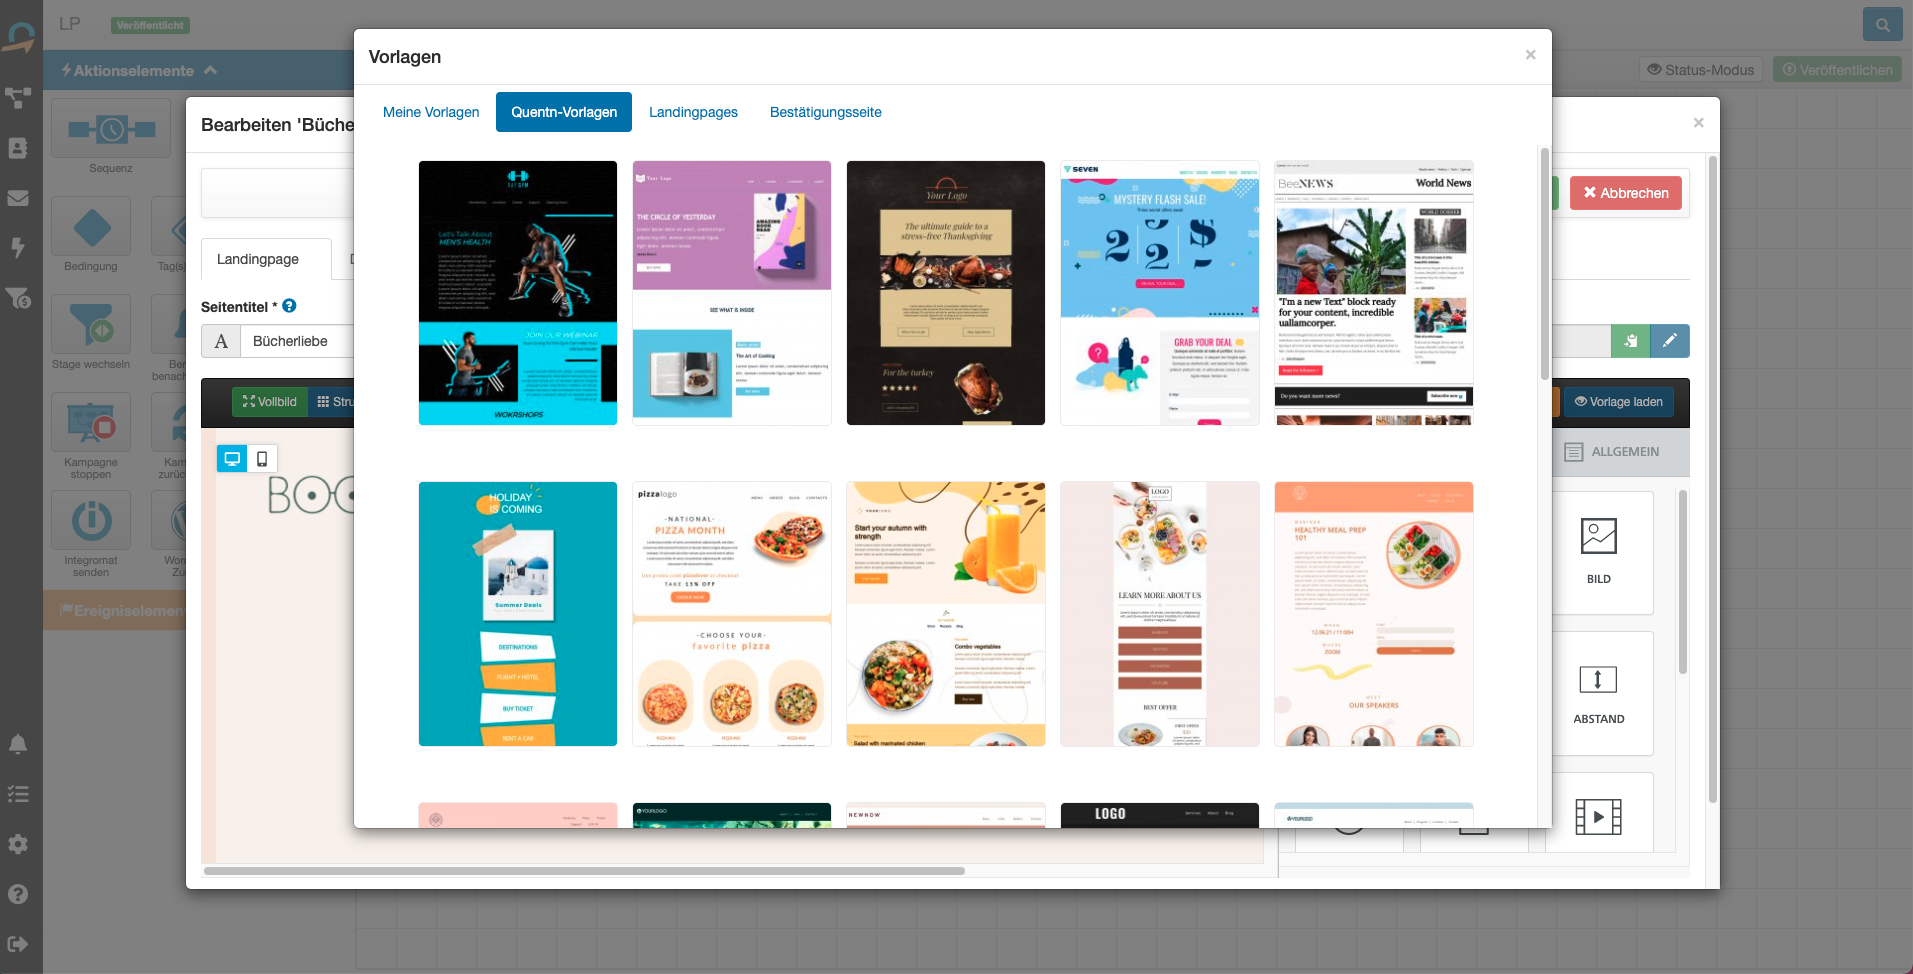
Create new template
Of course, you can also create your own template from scratch.
- Click on the menu item Campaigns and Templates. You will arrive directly at "My templates".
- Click on "Create new template".
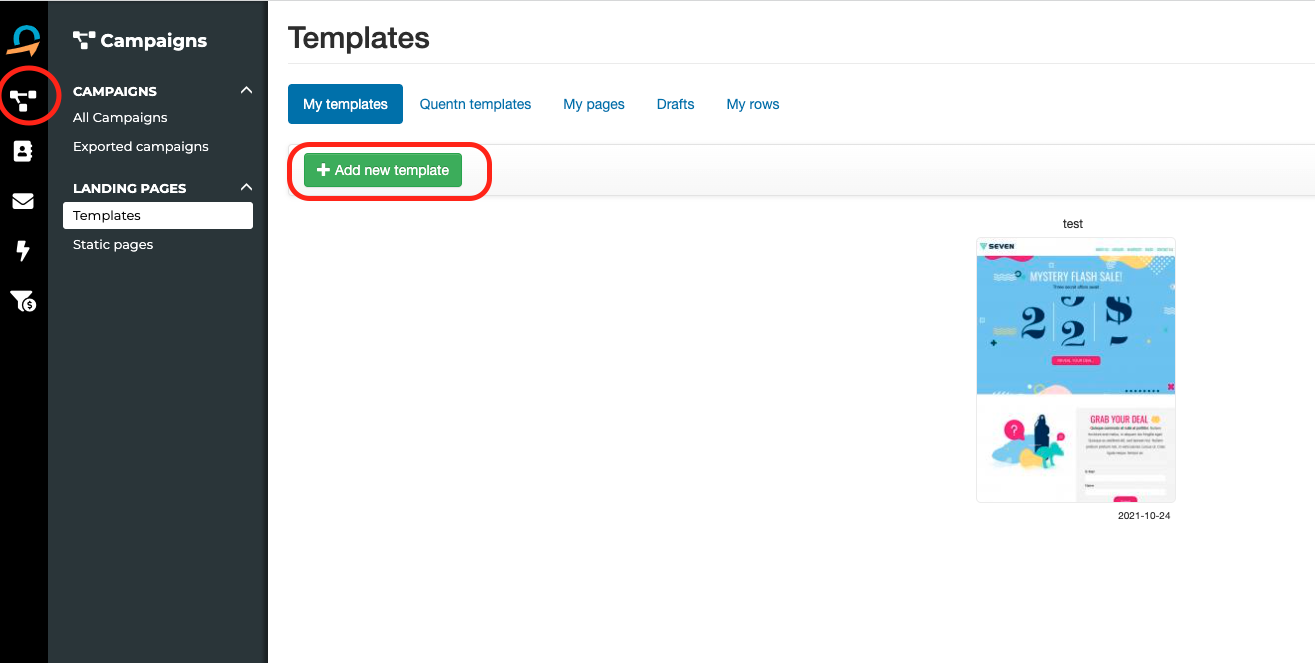
Alternatively:
- Create your landing page in the campaign.
- Click on the orange button labelled "Save as template" in the editor.
General information
The different pages
As soon as you open a template or the event element "landing page", you will see three tabs: the landing page, the thank you page and the thank you page (which is already verified). The last two are relevant for all contacts who have entered the form on your landing page.
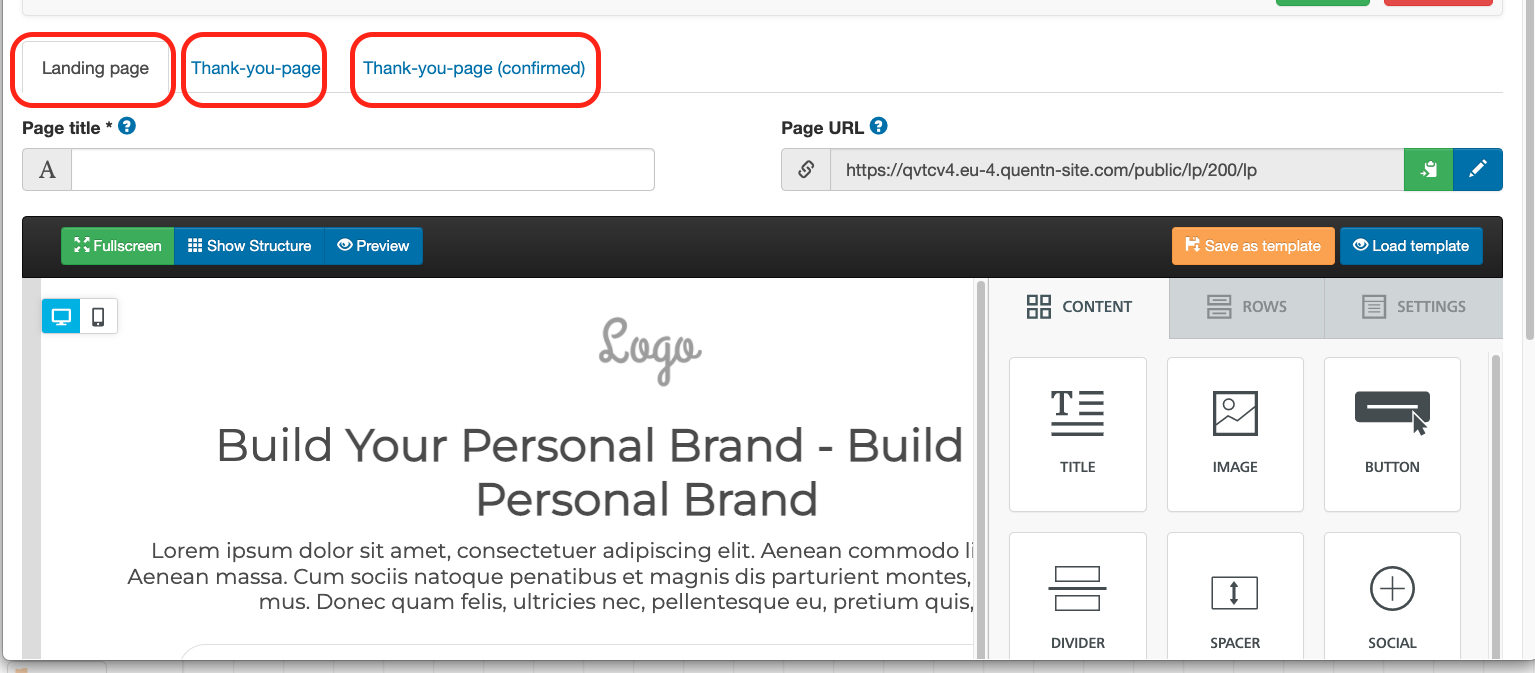
The landing page should contain at least one form for visitors to fill in.
The confirmation page will appear as soon as a previously unknown visitor has registered in the form.
The confirmation page (already verified) will be displayed for contacts who have already completed the double opt-in with you in the past.
Page title and URL
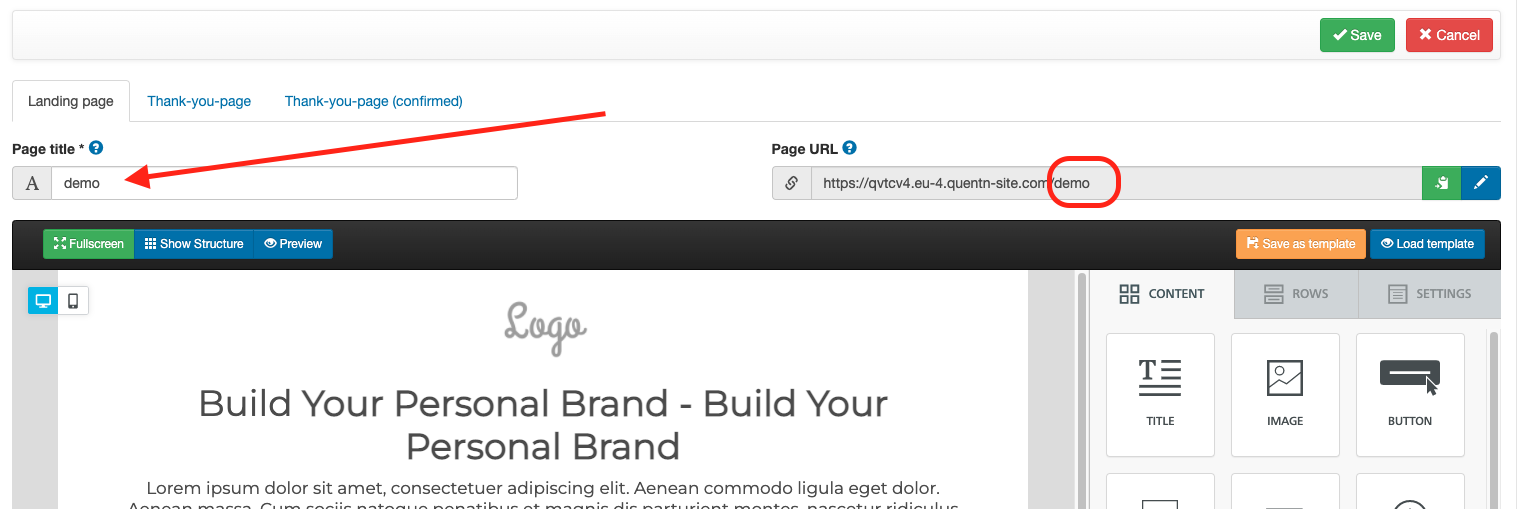
Please assign a page title. This should be short and concise, as it will be displayed to visitors in the browser tab.
The page URL is also generated from this title. However, you can edit this by clicking on the pencil icon. Please note that only small letters and no special characters may be used here.
Own domain
If you have a Business Account or higher, you can apply for your own domain for your landing page. This can be an entire domain (example.de) or a subdomain (page.example.de).
Subdomain (lp.my-page.de)
To apply for a subdomain, we need access to the DNS. Alternatively, you must manually set two entries yourself.
When applying for a subdomain, the main domain can still be used without any problems.
- We need the information which subdomain you would like to have (e.g. lp.meine-seite.de).
- We create a certificate for this domain in our cloud. In the process, a kind of "code" is generated.
- This "code" must then be set by you as a CNAME DNS entry for your domain. This is the "proof" that we are authorised to use your subdomain in our cloud.
- Once this record has been set correctly, we can create a new cloud instance and link it to your Quentn system.
- Finally, you will need to set another CNAME entry that will act as a redirect from your subdomain to the cloud instance.
Full domain (my-page.com)
When transferring to a full domain, please note that we need access to the DNS and that the name server must be switched. This means that everything runs via Quentn and the domain cannot continue to be used for e-mails etc.
Display and Navigation // Editing Tools
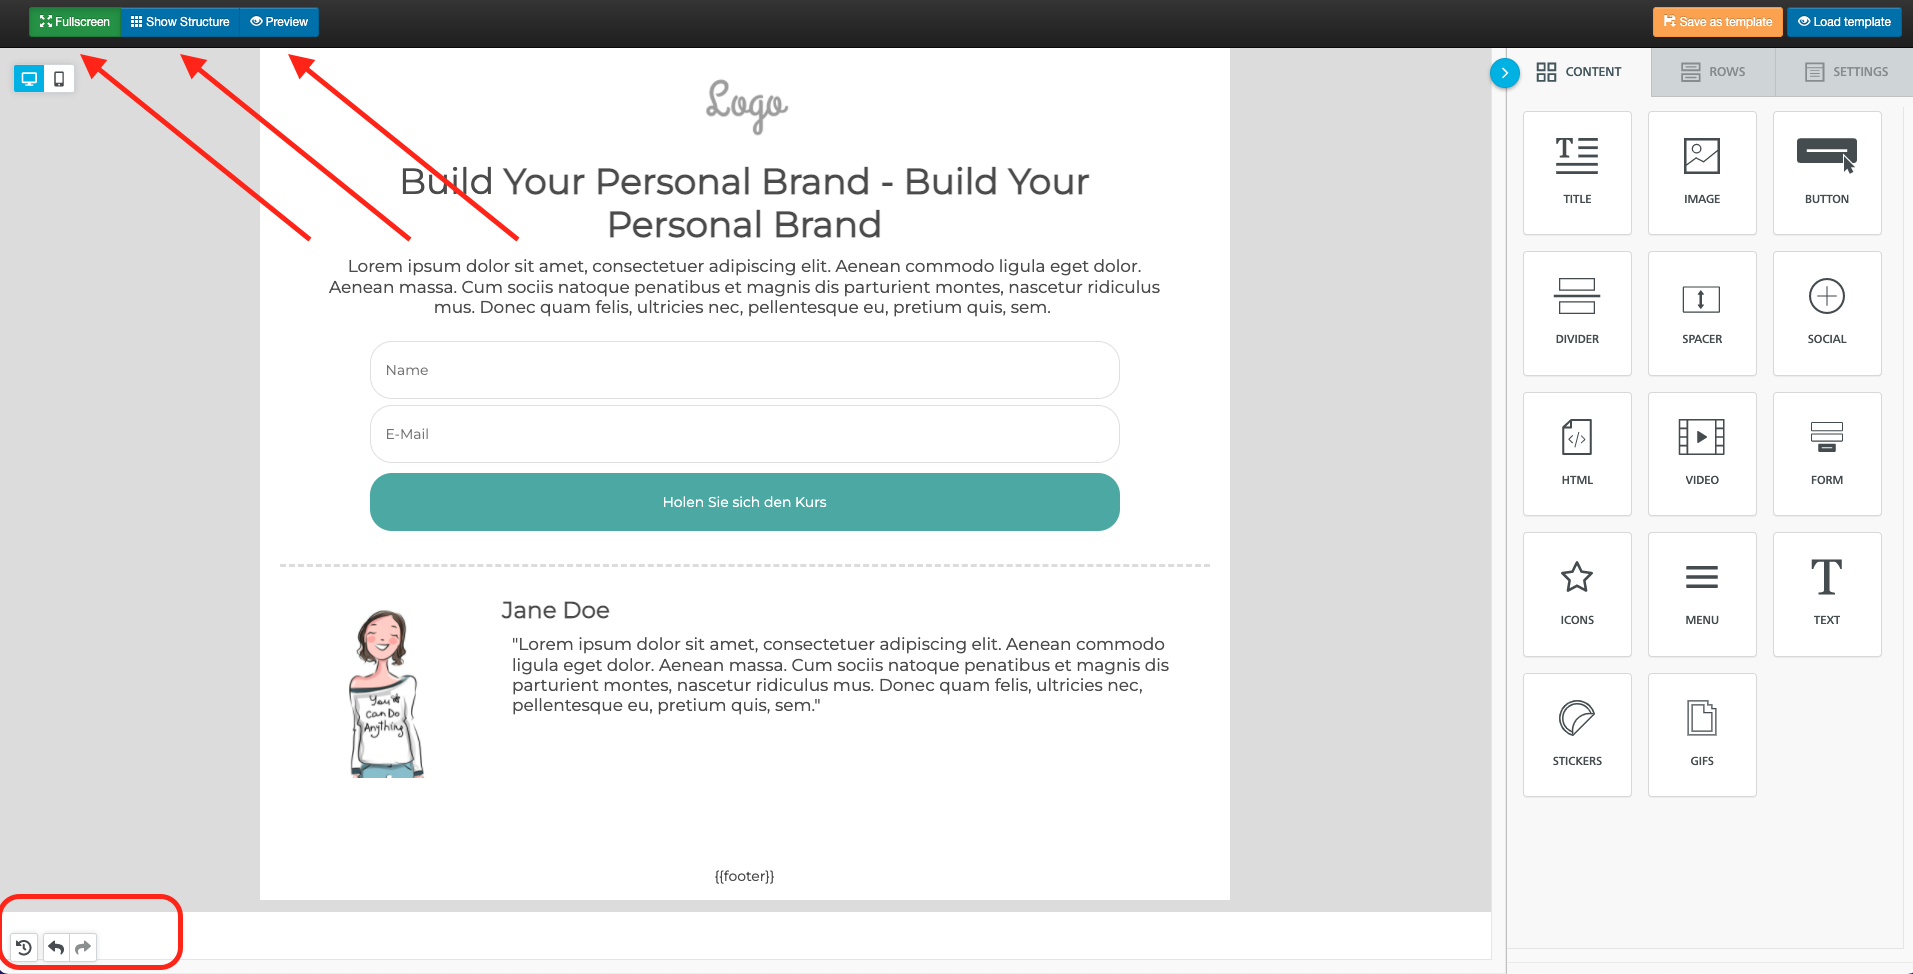
At the top of the template you will see three buttons:
- Press "Full Screen" to switch to full screen mode (recommended).
- By pressing on "Show structure" you can see the borders of the individual blocks, rows and columns.
- Pressing "Preview" allows you to see what your landing page will look like both on a computer and on a mobile.
- You will return to the normal view as soon as you click on the respective button again.
- To undo one of your design steps, you will find three symbols at the bottom left-hand side of your page: a round arrow with a clock, an arrow pointing left and an arrow pointing right.
- With a click on the clock symbol, your previous work steps will be displayed. This allows you to return to a specific point in the editing process. The layout is then restored exactly to what it looked like at the selected point in time.
- The arrow facing left undoes the last action.
- The arrow facing right takes you one step forward again.
Design: content
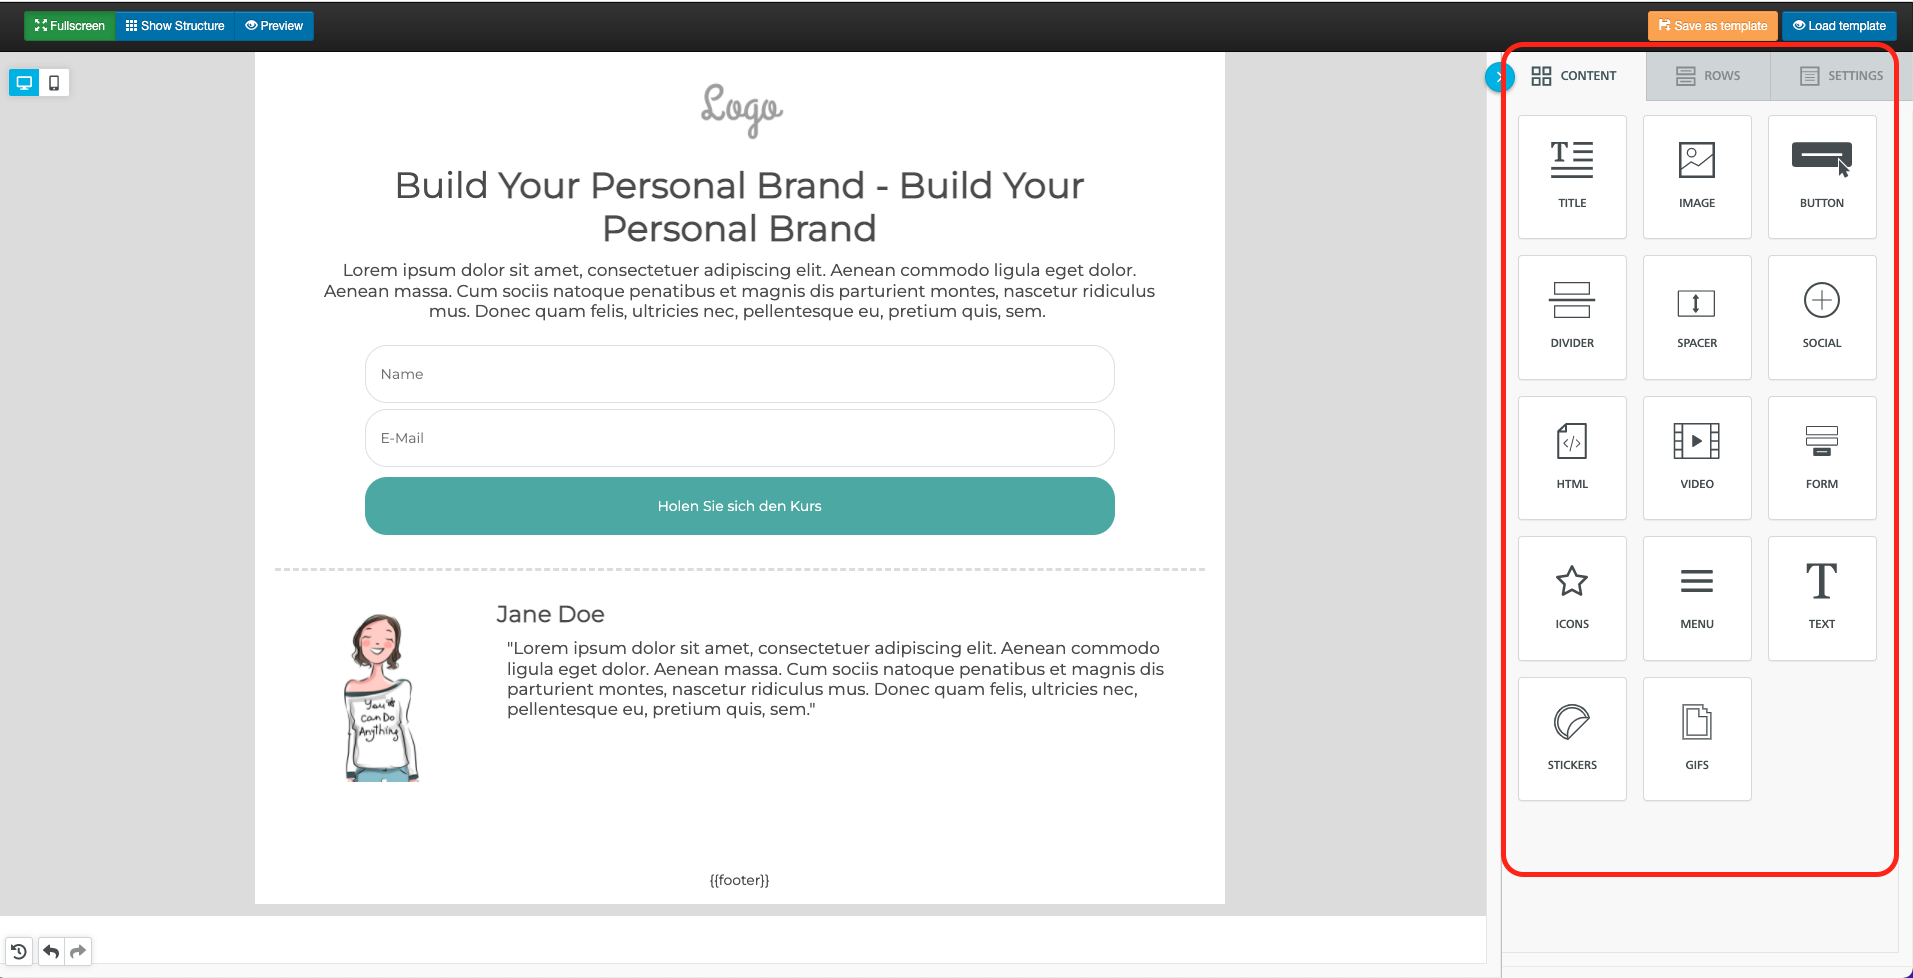
To the right of the template you will find the "Toolbar". Under the menu option you will see the individual building blocks that you can add to your page. Select the desired type (title, text, image, button, separator, social media button, HTML, video, form, icons, menu, stickers or gifs via the provider Giphy) and drag it to the desired position on your landing page whilst holding down the left mouse key. This position can then be altered as desired.
On your landing page, click on the block you want to edit. On the right-hand side you will then see advanced properties and options. You can adjust text and link colours, determine row spacing, define margins and make further edits to all other blocks.
Images
Upload images
To include your own pictures, select the type "Image" on the right and drag the element to the desired position. Then click on "Browse".
You will now arrive at the file manager. Here you will be able to upload the desired image and then insert it onto the landing page.
Attention: The maximum size for images is 8MB.
Choose from 500,000 royalty-free images
You also have a database of over 500,000 royalty-free images at your disposal which you can use.
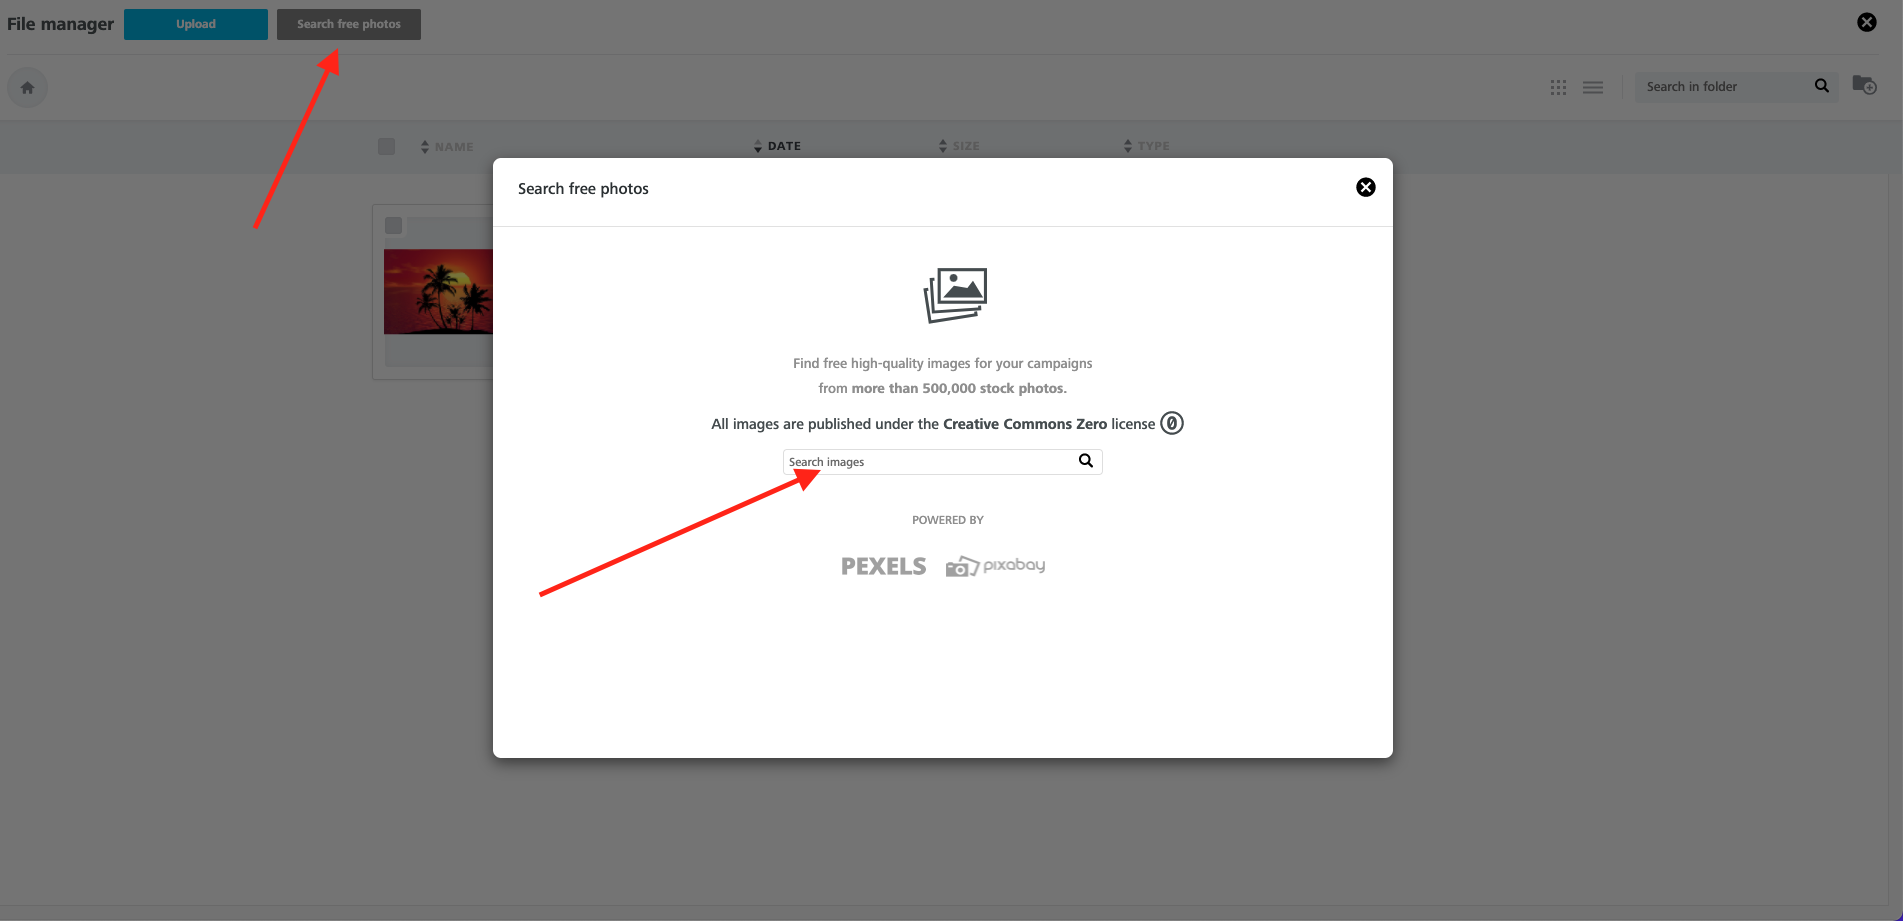
- Click on "Search for royalty-free photos" in the file manager.
- Enter a search term to select a suitable image.
- Click on "Import" to load the desired image into your file manager and then on "Insert" to insert the image onto your landing page.
Buttons
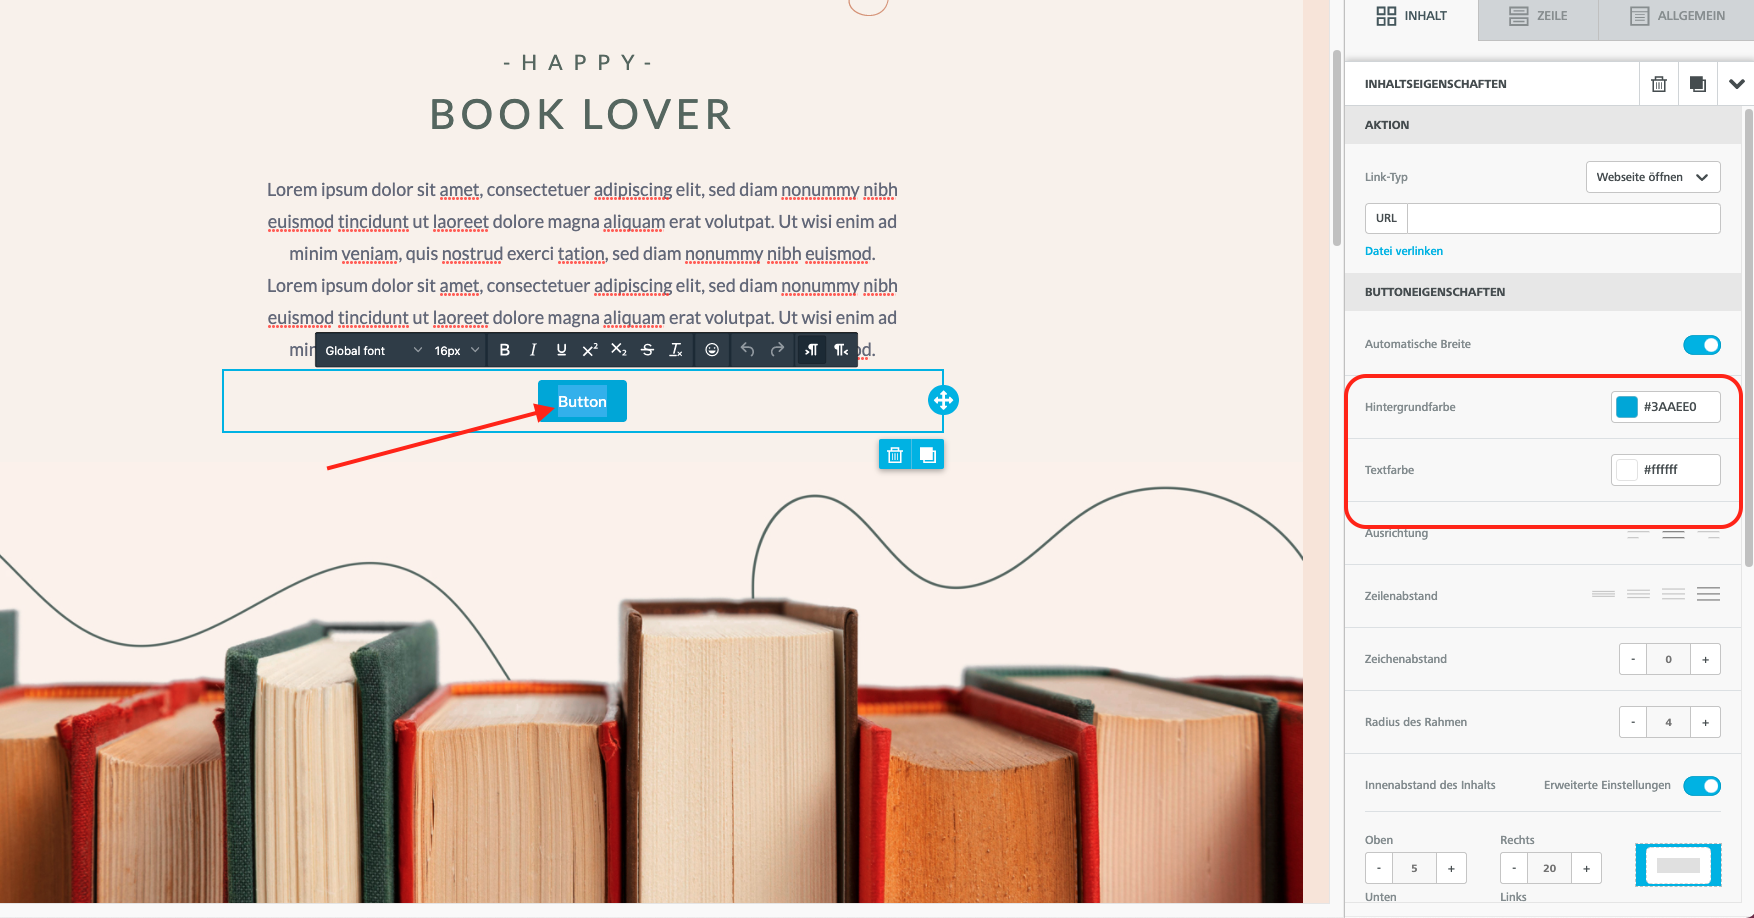
Drag the element of the type "Button" to the desired position. Then click on it and the content properties will open on the right. You can now enter a URL and adjust the background and text colour of the button.
To change the button's label, simply click on the button itself and write the desired text.
Create jump labels (anchor links)
Visitors to your landing page can also "jump" to a specific place on your page by clicking on a button, provided you use jump marks (also called anchor links). Proceed as follows:
- Click in the area you want to jump to and activate "Block identifier" on the right.
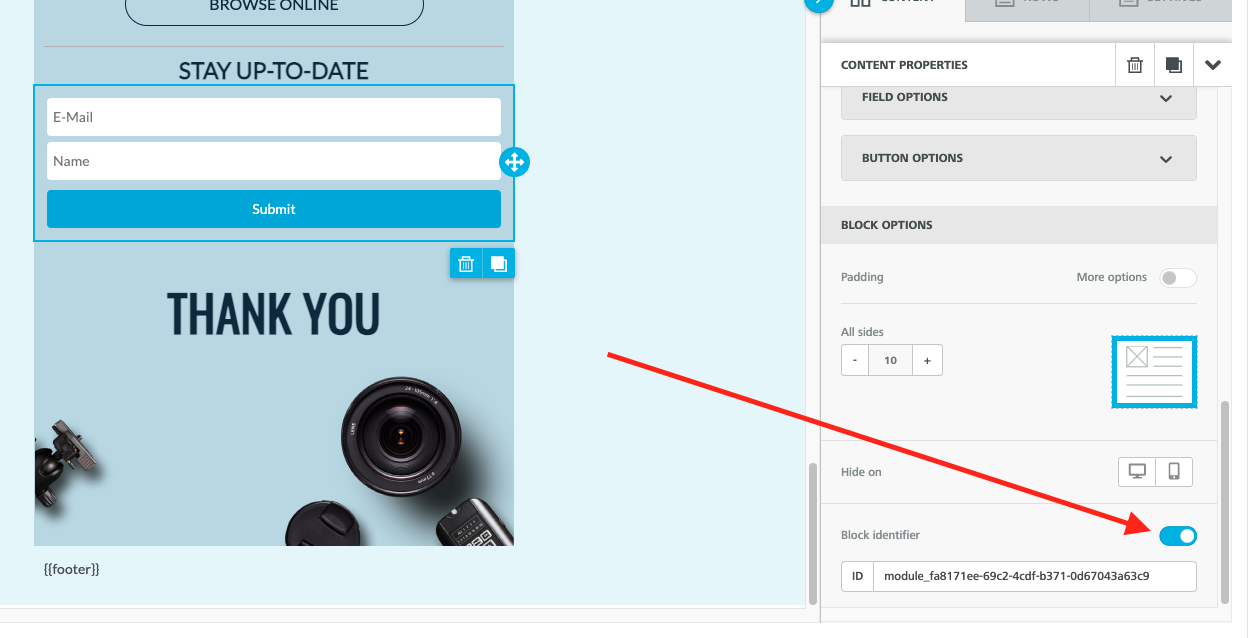
- Insert buttons on your web page that are to catapult to the area you have just marked.
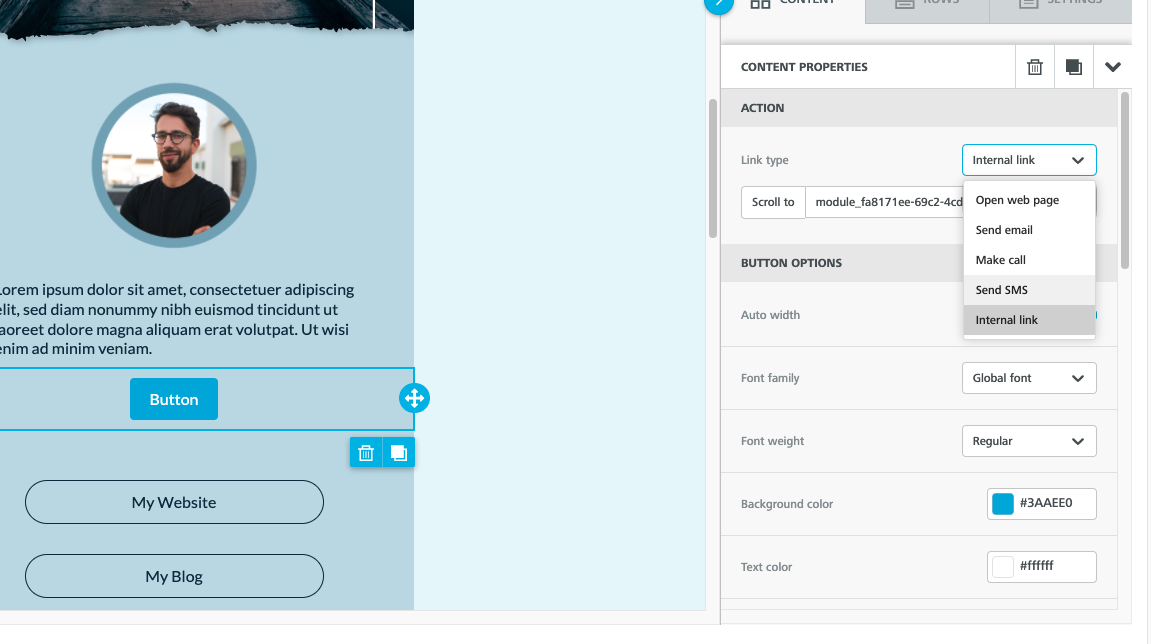
- Click on the button and enter "Internal link" as the link type.
- Select the module to which you want to jump.
Add social networks
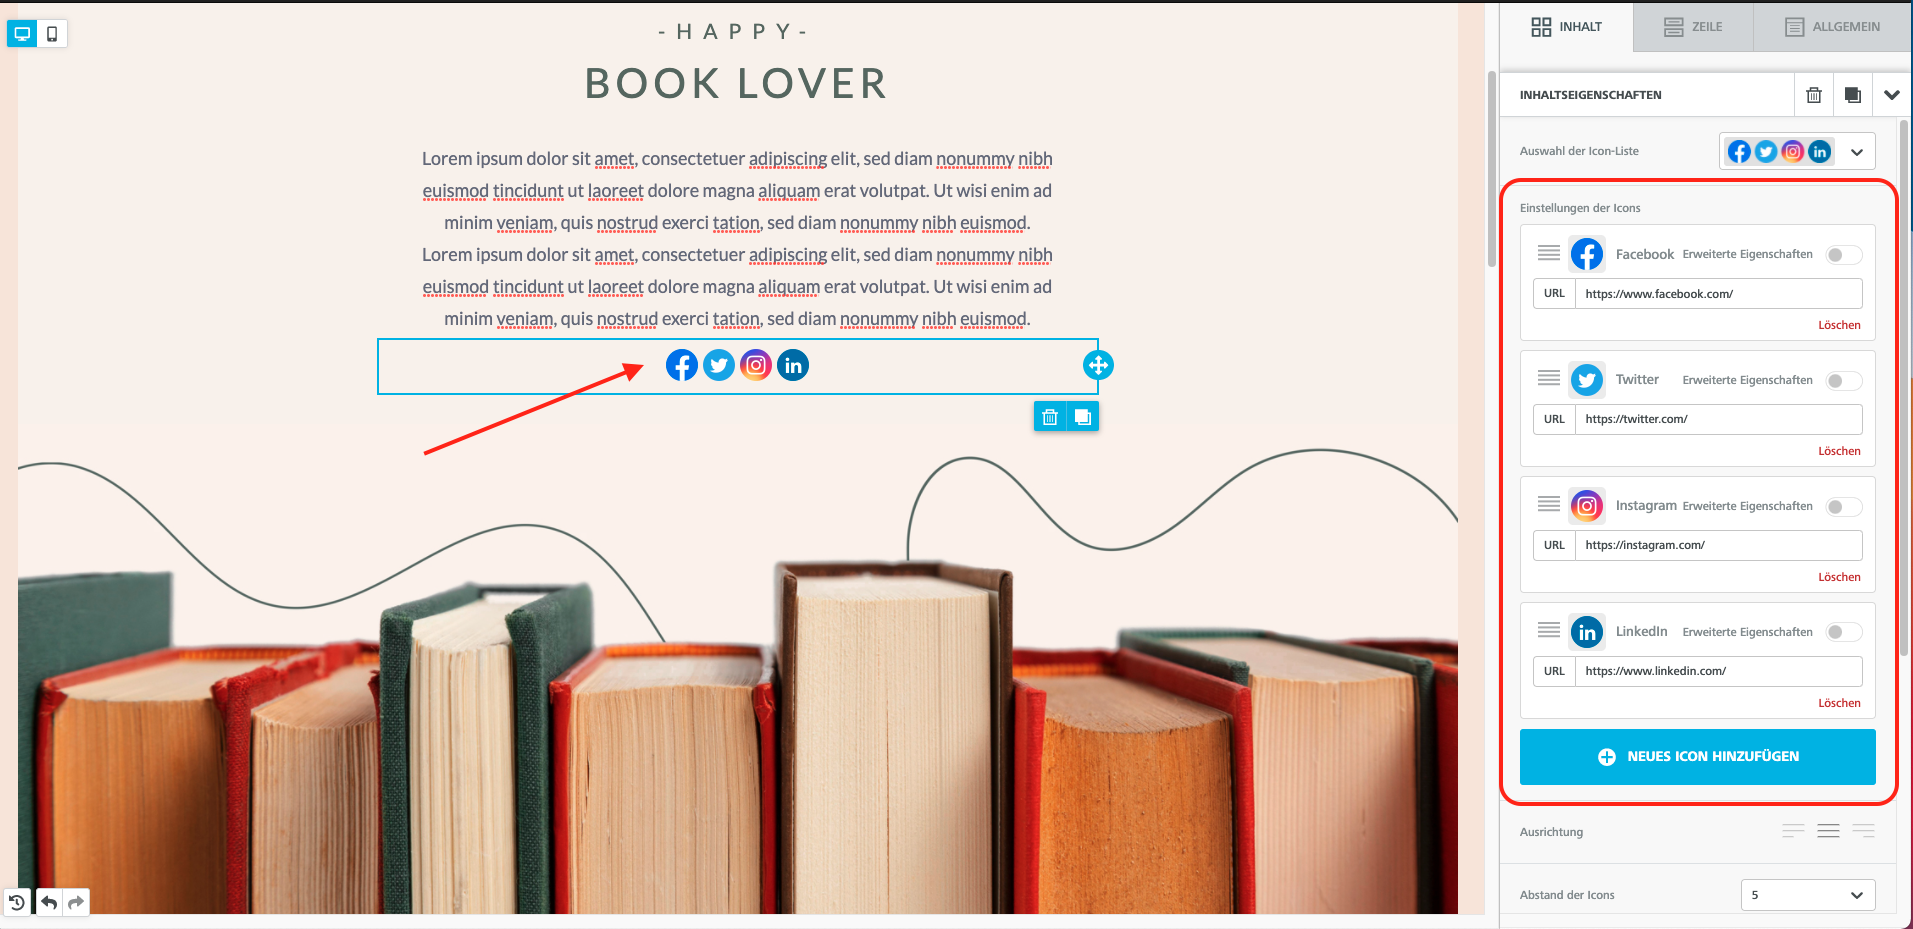
Drag the "Social" type element to the desired location on your landing page.
Then click on the row's content. On the right, you then have the option to add further social services and to remove the preset ones. You can also enter the corresponding URL to your page for each service.
Add links
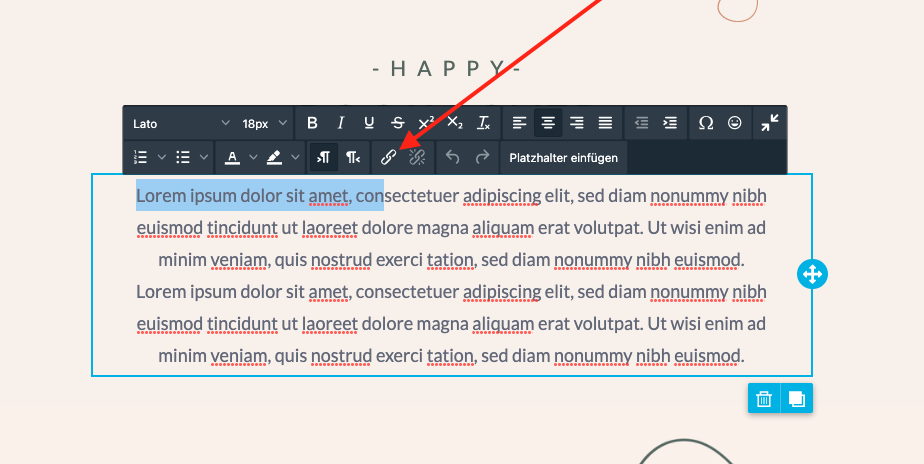
To insert links, select the text to be linked. Then click on the chain symbol in the toolbar. A window "Insert link" will now open. Select the link type and enter the URL. Click on "OK".
Own HTML
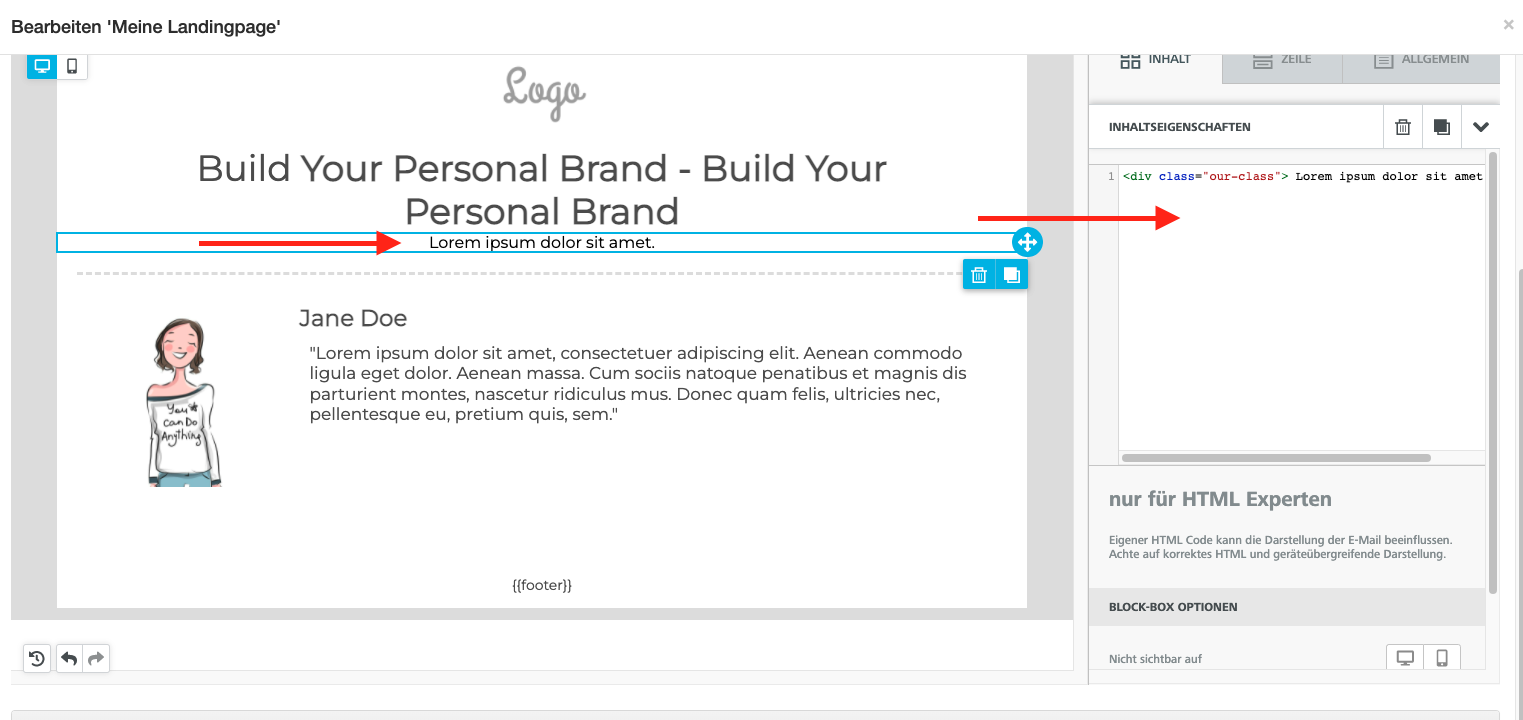
To use your own HTML, drag the "HTML" block to the desired location on your landing page. Then click on the content and enter the HTML code on the right.
Video
Of course, you can also include videos on your landing page.
To do this, drag the "Video" block to the desired location on your landing page and click on the grey button "Add Video URL".
On the right-hand side you now have three options under "Video URL":
-
Thumbnail: Only one of the video's images is shown and linked to a URL to the video.
-
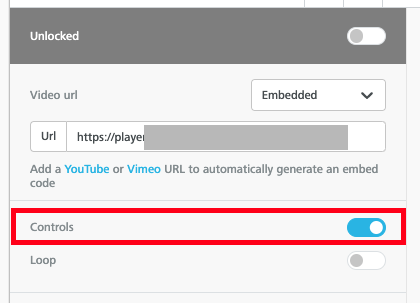
Embedded: Enter the link to the video on the relevant platform (NOT the embedded link, but the normal link) and the video will be embedded on your landing page so that it can be played.
-
Own video: Enter the link to your own video (e.g. in Dropbox, etc.). Note that you can also share the video with the public and not just with certain users.
ATTENTION: For Vimeo videos that are embedded, "Properties" must be activated on the right in the editor. Otherwise only the preview image is displayed and not the video is played.
Changing the background color of content
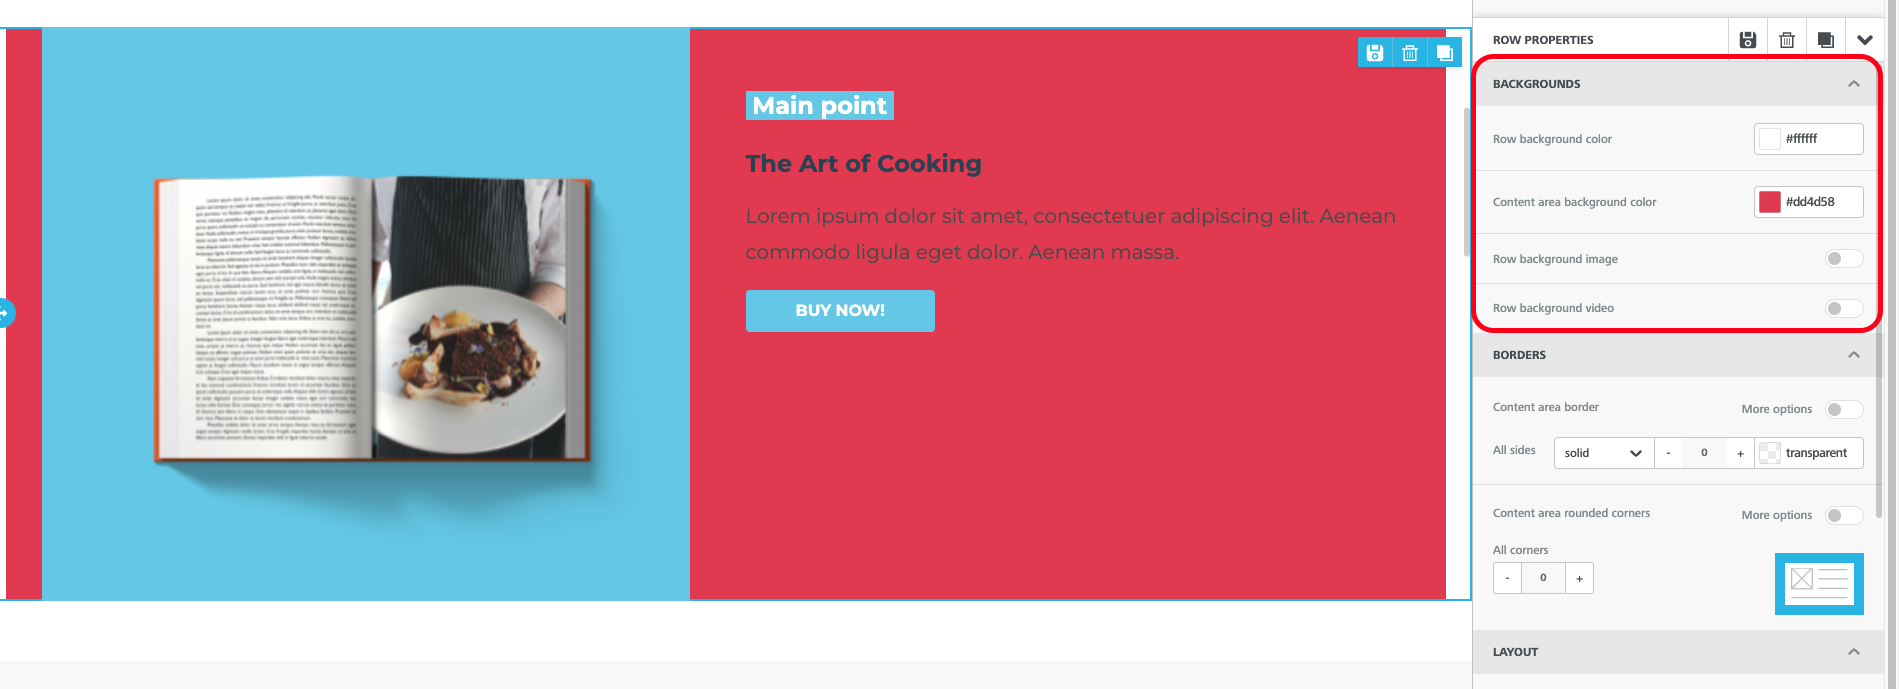
To change the background color of the content, first select the entire line.
Select the “Content background color”.
Set borders around content
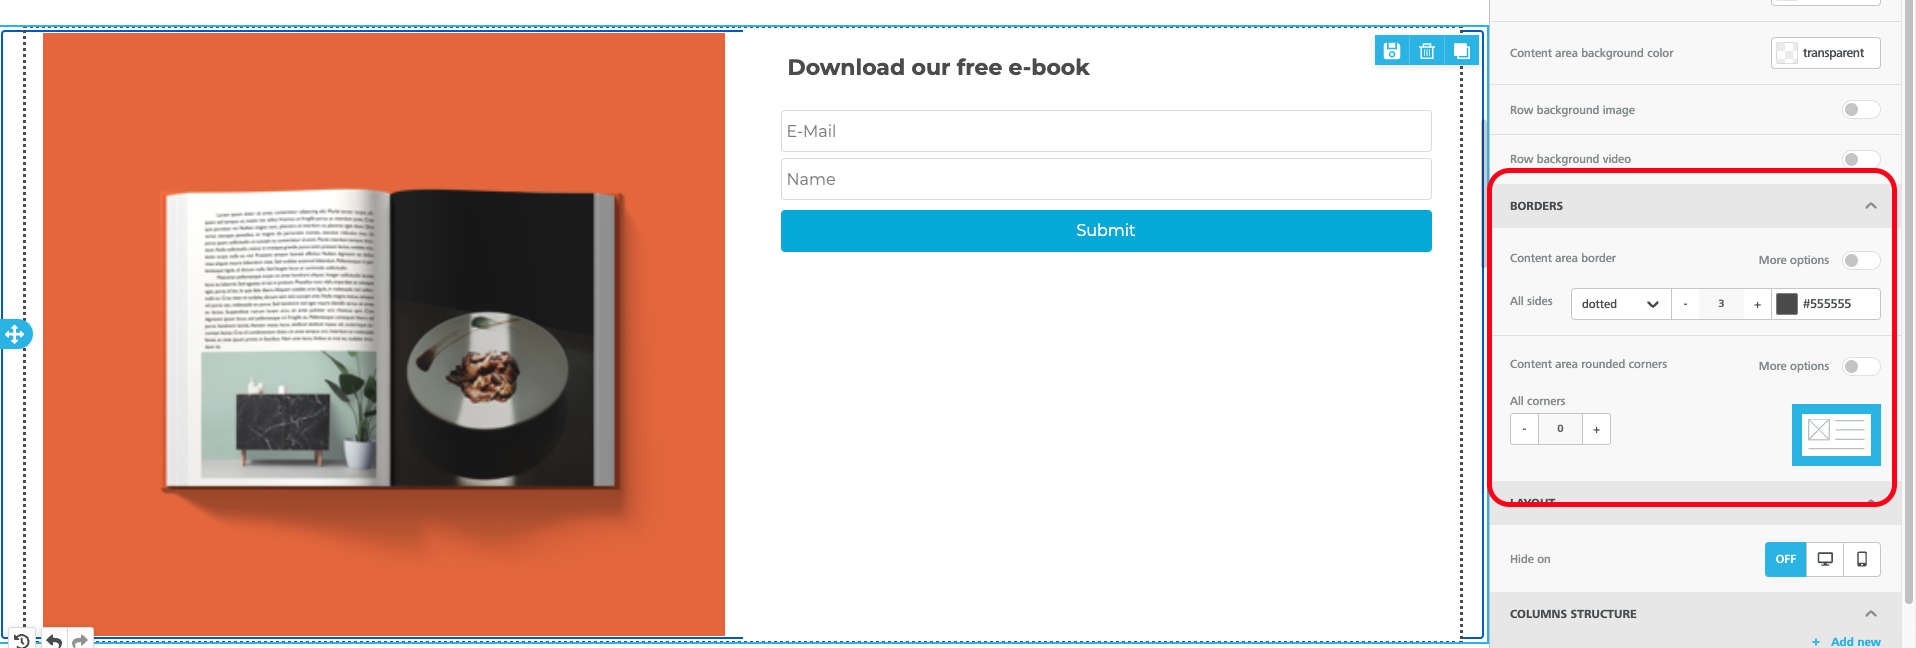
In the “Borders” section, you can set a border around your content.
Select whether the border should be dashed, dotted or solid, what thickness it should have and what color.
Different designs for desktop and mobile
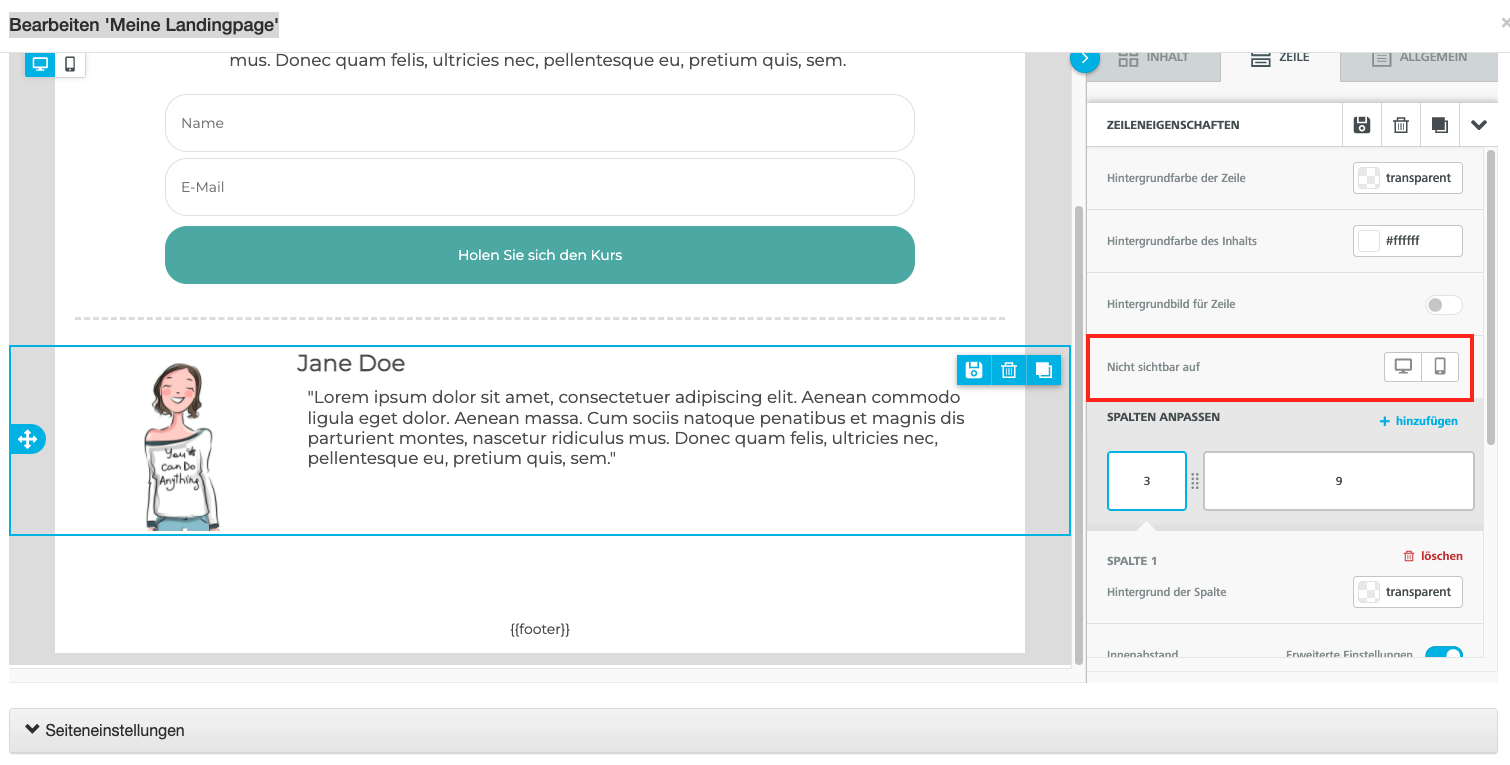
You have the option to display your landing pages differently on desktop and mobile devices. For example, you can hide images for the mobile version so that the reader on the phone can grasp the content more quickly (just as an example).
To do this, click on the content block you want to hide for desktop or mobile. On the right-hand side, in our "workbench", click the corresponding icon for either desktop or mobile under the menu item "not visible on".
Design: row
Under this menu item you will find a variety of different row layouts that you can drag onto your landing page.
If you click on an area outside the content on the left-hand side of your layout, you select a row. You can move this as desired in the content by clicking with the mouse on the cross on the left-hand side, keeping the mouse key pressed and then moving the element.
If a row is selected, an area appears on the right-hand side under the menu item "Row" in which you can set the row and column properties. You can define the background colour of the row and the content separately, determine background images for the row, define individual columns and much more.
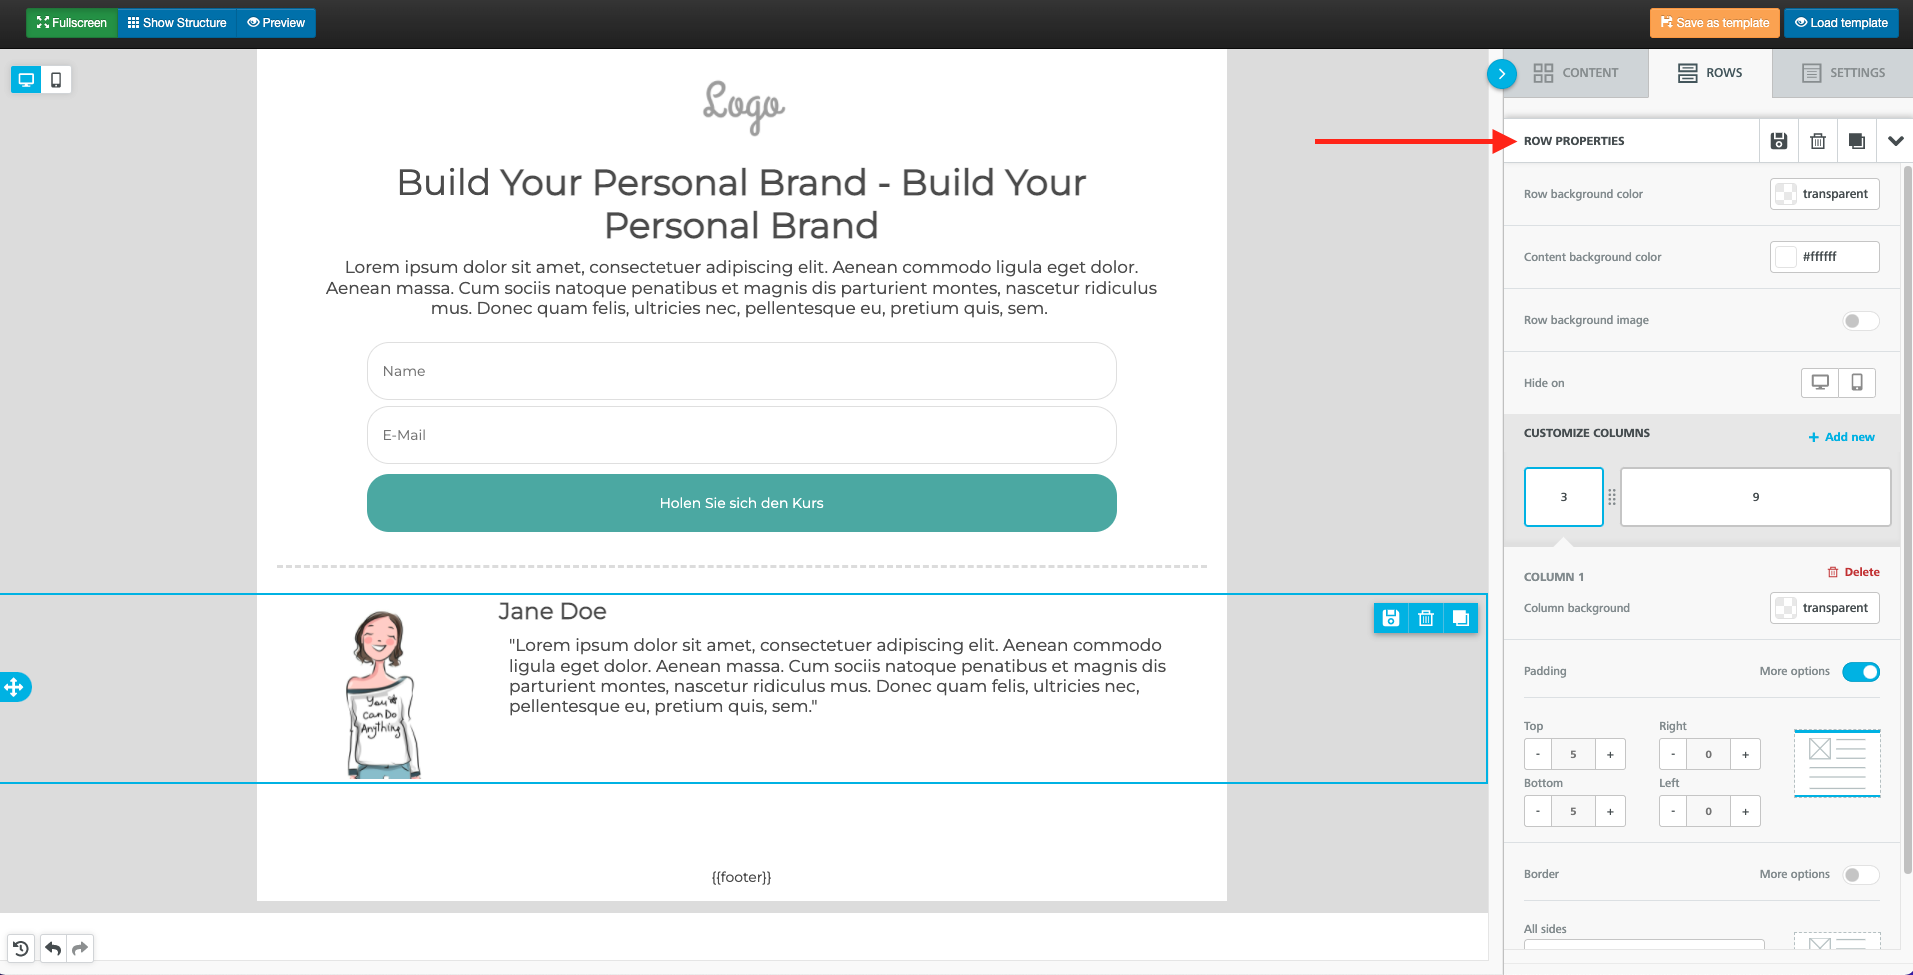
Likewise, you can save, delete or copy a row by clicking on either the disk, the recycle bin or the copy symbol in the right-hand margin.
To retrieve lines that were once saved, click on "Row" and select "custom rows" in the window instead of "Empty". Here you will find all the saved rows that you can now insert via drag & drop.
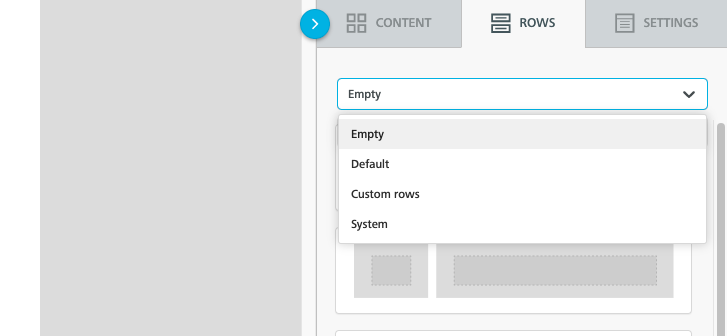
You can find an overview of all saved rows under "Campaigns" → "Templates" and then under the tab "My rows".
Static pages
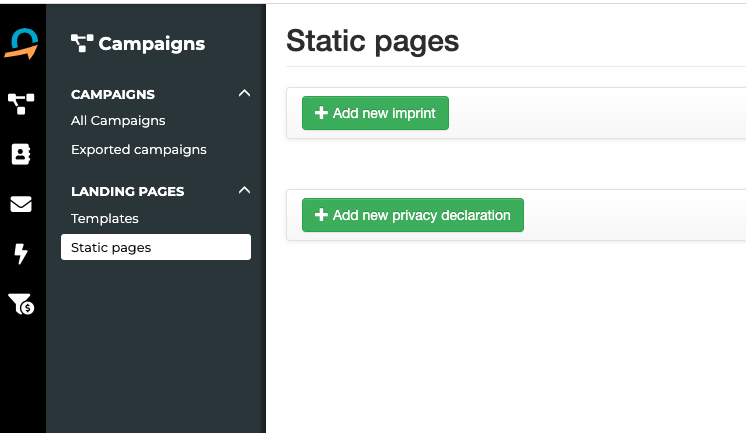
Create legal notice
To create a legal notice that matches the design of your landing page, proceed as follows:
- Click on the menu item Campaigns and Static Pages.
- Now click on the green button "Add new legal notice”.
- Now create a landing page in your desired design that contains your legal notice.
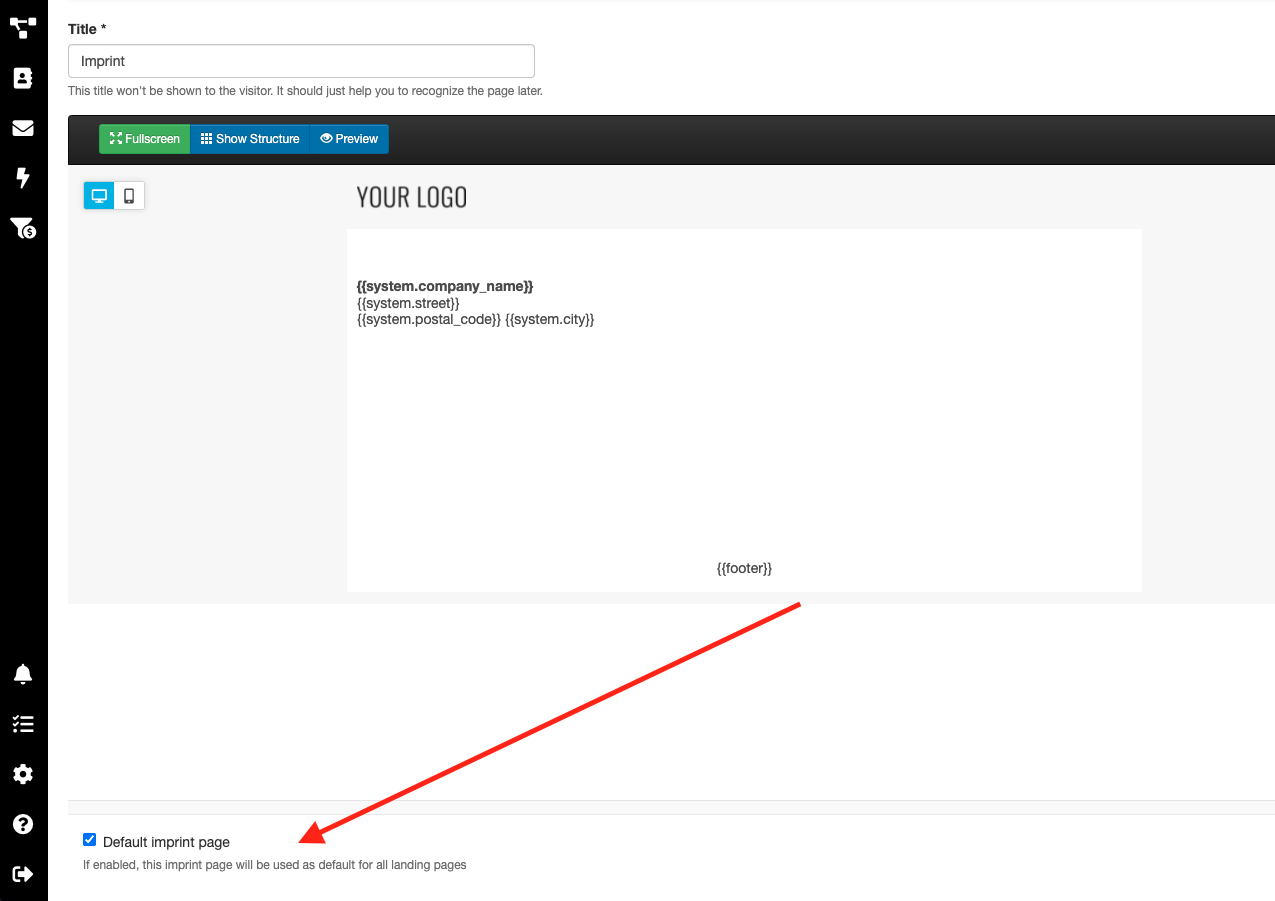
- Under the editor you now have the option of selecting this page as the default page for your legal notice by ticking the checkbox.
Create privacy policy
To create a privacy policy, proceed as follows:
- Click on the menu item Campaigns and Static Pages.
- Now click on the green button "Add new privacy policy".
- Now create a landing page in the desired design that exclusively contains your privacy policy.
- Under the editor, you now have the option of selecting this page as the default page for your privacy policy by ticking the checkbox.
Page settings
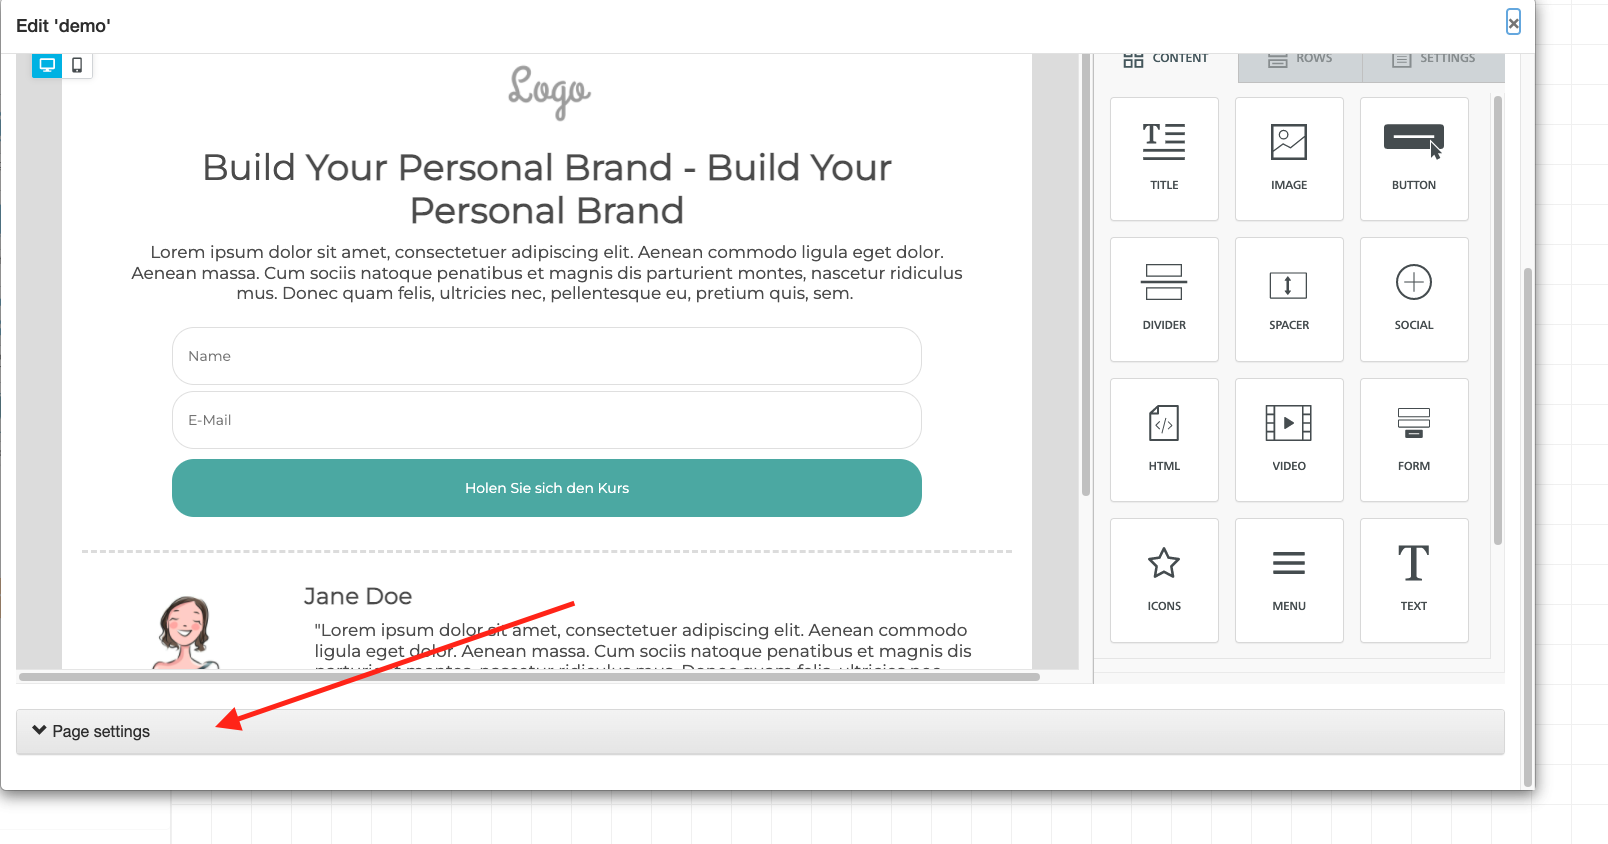
For all pages, you can enter additional information in the header, body and footer (e.g. scripts from Google, etc.).
To do this, click on "Page settings" below and enter the information in the desired place.
You can enter your Facebook pixel or Google pixel (etc.) here to track site visitors via these providers.
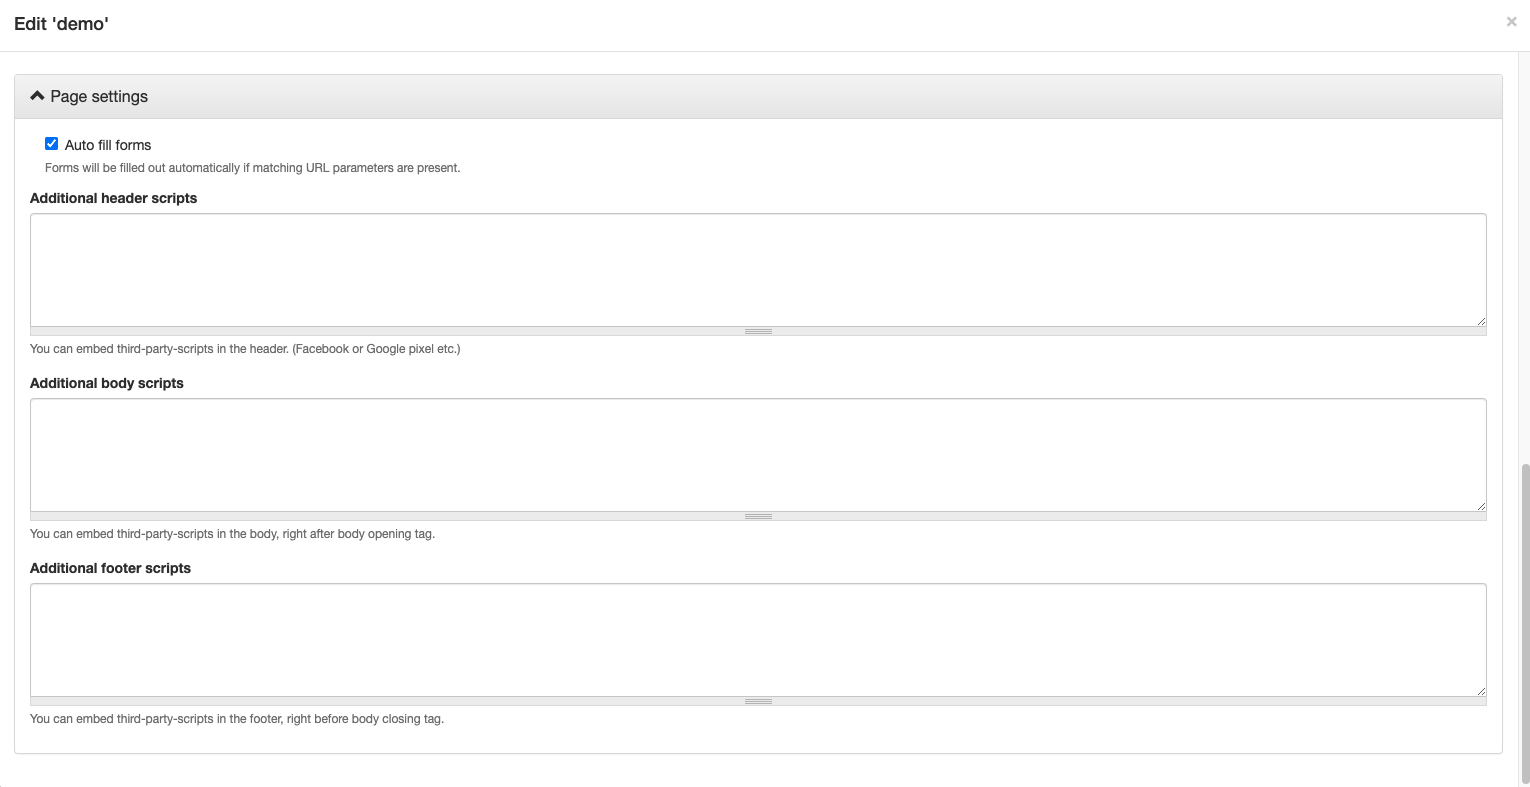
Note: Please note that the scripts are not validated. If they contain errors, the page may not be displayed properly.